Pre-Flight Inspection Essentials
Check the Propellers for Damage or Debris
Stillness before launch is deceptive. The blade geometry determines lift. If it breaks, lift dies. We look for cracks, but the subtle warping from a hard landing is the true culprit. That imperfection can stall the motor’s rhythm.
Debris is another animal. A sliver of grass or dried mud is an uninvited passenger! I once found a pebble under the rotor hub, a tiny irregularity that caused a violent wobble. Check the underside of the blades, the surface meets the motor shaft. Check for hairline fractures along the trailing edge.
- Inspect for scuffs that look like sandpaper.
- Rotate the prop for binding.
- Confirm mounting screws are flush.
Taking those seconds is an act of discipline. It is cheaper than replacing a frame. It is the difference between an uneventful flight and a quadcopter not taking off because the system senses an imbalance.
Verify Battery Charge and Connection Security
Every pilot knows the sinking feeling of a silent quadcopter not taking off. The pre-flight battery check deserves more than a glance. A voltage reading tells you charge, not health. When a cell sags under throttle, the power system cuts out before the rotors spin. That is why I measure each cell. The total pack voltage alone hides a weak link.
Connection security is the overlooked factor. A plug that seats with a click today can loosen after a rough landing. Inspect the connector pins for pitting. Push the battery leads into the drone, then give a tug. If anything moves, you have found the problem. Loose connections mimic software faults.
My routine:
- Check resting voltage per cell.
- Balance charge if cells differ by 0.1 volts.
- Tug test each lead after seating.
A battery has limits. Respect its terminals and your quadcopter will not leave you grounded.
Inspect the Frame and Landing Gear for Cracks
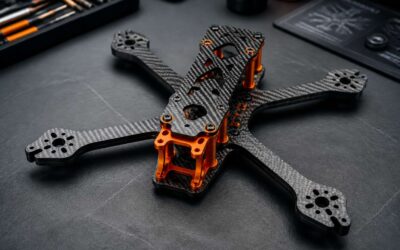
A cracked frame rarely announces itself. The break hides under the battery strap or inside a motor mount. On the ground, the quad looks fine. Under throttle, the flex steals thrust. The motors spin at different angles. A quadcopter not taking off has a fracture that appears under load.
I run my fingers along every arm before flight. I check the landing gear where it meets the body. That joint takes the hardest strikes. White stress marks mean the plastic is already failing. My routine:
- Press each arm tip for creaks
- Remove the canopy to inspect the center plate
- Check screw holes for elongation
The terrain in South Africa punishes weak frames. Rocky fields and dry grass hide uneven surfaces. A hard touchdown on a stone cracks a mount without bending a blade. A quadcopter not taking off after such a hit usually points to the frame, not the electronics.
Confirm the Flight Mode and Switch Settings
The ground check tells you what the air will deny. Most pilots assume a quadcopter not taking off is a power failure, yet the fault often lives in the flight controller’s brain. A switch flipped to the wrong position, a mode selected for GPS hold when the satellites are scarce, these small errors create a machine that refuses to obey.
I have seen a fully charged craft sit motionless because the operator left the throttle curve in a beginner setting. The motors spun, the lights blinked, but the quadcopter not taking off simply sat there, humming its frustration. Verify your switch assignments before you arm the motors. Confirm the flight mode indicator on your transmitter screen matches your intention for the session.
– Check the mode switch position against the manual
– Verify the arming switch is not assigned to a momentary toggle
– Confirm the throttle channel reads zero in the monitor
A quadcopter not taking off often stems from a single overlooked setting. The transmitter holds the conversation, and the flight controller listens. In the South African bush, where wind shifts without warning, the wrong mode can turn a calm hover into a violent roll. Review your failsafe settings too, because a receiver in the wrong binding mode will ignore your stick inputs entirely. Take the extra minute on the ground, and the sky will reward you.
Battery and Power System Failures
Dead or Depleted Batteries
A quadcopter not taking off often has a cause that is hiding in plain sight. You might have a battery showing a full charge, but the power delivery is a hollow shell. Voltage sag under load is the primary culprit. A depleted cell can briefly show nominal voltage, then collapse the moment the motors demand their full current draw.
This sudden drop triggers the flight controller’s low voltage cutoff. The system prevents a catastrophic crash by refusing to spin the rotors. The result is a stubborn machine that sits silent on the tarmac. The battery chemistry is exhausted. The power curve is no longer viable for flight.
Consider these specific failure states:
– One cell in the pack is permanently damaged, reducing total capacity.
– The internal resistance has risen sharply, causing heat loss instead of thrust.
– The battery is cold, which slows the chemical reaction needed for discharge.
– The charger ended the cycle early, leaving the pack at 80 percent.
Each of these scenarios creates the same symptom. The motors stutter or fail to spin entirely. If you are dealing with a quadcopter not taking off, inspect the pack’s physical condition. Look for swelling or a pungent smell. The battery is the heart of the system, and a weak pulse means no liftoff.
Poor Battery Connector Contact
Battery connectors sit between stored energy and spinning rotors. When those contacts corrode or loosen, the power flow becomes erratic. A quadcopter not taking off may show full voltage on a meter, yet the current cannot cross the gap cleanly.
South African conditions are harsh on connectors. Dust from the Highveld and coastal humidity attack the metal surfaces. This creates resistance that limits the current. The motors demand high current, but the connection throttles it.
- Deformed pins that no longer seat firmly
- Oxidation forming a grey film on contact points
- Worn sockets that allow slight movement during throttle
Each fault interrupts the current path at the worst moment. The flight controller sees the voltage drop and refuses to spin the rotors. The result is the same stubborn silence. The quadcopter not taking off is often a victim of these tiny, overlooked contact points.
Faulty Power Distribution Board
Most pilots blame the battery first when a drone sits silent. They are often wrong. The power distribution board is the central hub that directs voltage to each motor. A failed solder joint or a broken capacitor can stall the entire system. I once repaired a quadcopter not taking off because a stray blob of tin had bridged two traces. The battery showed full charge. The connectors were spotless. The board itself was the saboteur.
Board failures often leave clues:
- Motors that twitch erratically when arming
- A hotspot on the frame during idle
- A burnt aroma after a short flight
These symptoms point to voltage instability. The flight controller registers the problem and prohibits rotor spin. You check the usual suspects first. The true fault hides inside that multi layer board. A thorough check demands a multimeter across the input and output pads. That reveals the break.
Overloaded or Swollen Battery Packs
Battery denial is a curious thing. Pilots will hover, fiddle with transmitter trims, and reflash firmware before they ever look at the physical state of their power source. I have seen it happen countless times. The quadcopter not taking off is often a simple case of physics, and the battery pack is the guilty party.
A swollen cell is a silent scream for help. The lithium polymer pouch expands, pushing against the hard casing, and the internal resistance spikes. The pack might show a healthy voltage at rest, but the moment you demand full throttle, the voltage collapses. The flight controller sees the sag and cuts power to protect the electronics. It is a safety feature, not a malfunction.
Consider these visual cues:
– A battery that feels soft or squishy to the touch.
– A casing that has cracked along the seam.
– A connector that shows any sign of melting or discoloration.
An overloaded pack suffers a similar fate. You push the capacity to its limit, drawing more current than the cells can deliver. The chemistry degrades, the temperature rises, and the performance drops off a cliff. I have found that a simple voltage test under a known load is the only reliable way to diagnose this. The resting voltage is a lie. The true condition of the pack only reveals itself when the motors are spinning. That is when you discover why your quadcopter not taking off is staring at you with such defiance.
Incorrect Battery Size or Voltage Rating
Selecting the wrong battery size or voltage rating is a subtle betrayal of the entire power system. I have watched pilots mount a 4S pack on a 3S build, lured by the promise of extra thrust. The quadcopter not taking off becomes a puzzle of fried ESCs and motor desync. Electrical engineers call this overvoltage a rapid unplanned disassembly.
Physical size matters just as much. A pack that is too tall or too wide can pinch wires, or slide forward and disconnect the main power lead mid-spool. The voltage drop under load then mimics a flat battery.
- Check the required cell count printed on the motor or flight controller.
- Measure the battery bay before you buy a replacement.
- Look for a bulging or tight fit that stresses the connector.
Voltage rating mismatches produce a distinct symptom: the motors twitch, then stop. The flight controller detects an anomalous input and refuses to arm. Resting voltage often reads fine on a multimeter, yet the quadcopter not taking off is a direct cry for a compatible pack.
Motor and Propeller Troubleshooting
Bent or Warped Propeller Blades
A propeller that looks perfect at rest can still betray you in motion. When the motor spins, a bent blade produces uneven lift, and the quadcopter not taking off often traces back to this silent flaw. I have watched drones shudder sideways or refuse to rise entirely because one blade tilted a hair below its sibling.
Inspect every blade from the side, holding it against a straight edge. Look for subtle twists along the length, not just obvious breaks. A small warp reduces thrust more than you expect.
- Hold the propeller level and sight down its span.
- Spin it slowly and watch if the tips trace a flat circle.
- Compare both props on the same motor for identical pitch.
If any blade fails these checks, replace it immediately. A warped prop will not straighten itself, and no amount of motor tuning can fix the imbalance. Your quadcopter needs true blades to break free of the ground.
Improper Propeller Installation or Orientation
The most counterintuitive cause of a quadcopter not taking off lives in the mounting process itself. Pilots often assume that if the blades are pristine and secure, the drones will fly. This assumption ignores the physical reality of rotation. A quadcopter relies on opposing forces. If the motor spins clockwise, the propeller must have the correct pitch to grab air from above. Mounting it backwards reverses the airflow, pinning the craft to the earth.
Manufacturers stamp an orientation indicator on the propeller, usually a letter or a number. Each arm of the frame has a designed rotation direction. Swapping props between the front and rear positions invites immediate failure. I have seen several instances where a quadcopter not taking off stemmed purely from this misstep. Verify the motor direction against the propeller’s leading edge.
Consider these points when inspecting your setup:
1. Confirm the propeller’s marked rotation direction aligns with the motor’s spin.
2. Check that the propeller is fully seated on the motor bell.
3. Tighten the mounting nut or screw to secure the blade without stripping the threads.
A loose propeller can slip mid-spin, causing a sudden loss of thrust. This manifests as a drone that wobbles violently but cannot climb. The fix is simple, yet it requires patience and scrutiny.
Furthermore, pay attention to the adapter rings common in many propeller sets. A plastic insert ensures a snug fit on the motor shaft. If this ring is missing or the wrong size, the propeller sits off-centre. The imbalance then creates a vibration that confuses the flight controller entirely. The result is often a quadcopter not taking off despite the motors spooling perfectly. A firm, flush mount is the absolute minimum requirement for lift.
Seized or Burnt Out Motor Windings
Nearly every pilot who faces a quadcopter not taking off assumes the fault lies in the software or the transmitter. The physical hardware of the motor itself can betray you in absolute silence. A seized bearing or a burnt winding produces no visible drama; it simply refuses to spin with the necessary authority. You might hear a click, or you might hear nothing at all. The propellers sit there, waiting, but the drone remains glued to the ground.
The motor’s internal resistance tells the story. When you spin the propeller by hand, a healthy motor rotates with smooth, consistent resistance. A seized unit feels gritty or locks up completely. Burnt out windings often smell of hot lacquer, a distinct electrical odor that remains long after the flight. This failure mode usually follows a hard crash or a stalled propeller in tall grass.
– Check motor temperature after a failed takeoff attempt
– Compare the resistance of all four motors by hand
– Listen for grinding sounds during spool-up
The flight controller does not understand mechanical failure. It sends power, expects rotation, and receives nothing. This confusion often results in erratic beeping or a rapid throttle cutoff. The result is a quadcopter not taking off, even with a fresh battery and perfect propellers. A faulty motor demands replacement, not repair. Rewinding or cleaning rarely restores the precise magnetic balance required for stable flight.
Loose or Misaligned Motor Mounts
A motor mount that shifts by even a millimetre changes the thrust angle. The flight controller compensates, then overcompensates. A quadcopter not taking off may simply be fighting its own geometry.
Check each mounting screw for torque. A loose screw allows vibration to walk the motor out of alignment. A misaligned mount tilts the propeller plane, so one arm produces lateral thrust while the others push upward. Both faults create the same result: a quadcopter not taking off despite healthy motors and clean props.
1. Inspect the screw heads for wear around the socket.
2. Press on each motor base to feel for play.
3. Measure the gap between the bell housing and the arm.
Frame injection moulding can warp under prolonged sun exposure on the Highveld. Replacing the mount costs less than an afternoon of troubleshooting an invisible vibration source.
ESC Calibration Errors
After any hardware change, an ESC may forget its throttle endpoints. The result is a quadcopter not taking off despite a sprightly battery and eager motors. I have watched pilots rebind the transmitter three times before realising the true culprit was a calibration offset. The ESC now interprets the first stick movement as full throttle, so it refuses to arm properly.
Signs are subtle. Your motors twitch but refuse to spin up evenly. The flight controller logs no errors, yet the craft stays stubbornly grounded. Check the ESC manual for the correct stick sequence, usually full throttle then disarm. A misread beep pattern is your clue. Recalibrate after replacing a motor or receiver. These ten seconds save you from an afternoon of blaming gravity.
Wiring Short Circuits or Broken Connectors
A sporadic power cut during a windy afternoon is one thing. A fried power system from your own soldering iron is another. Many pilots in South Africa skip the multimeter and blame the flight controller when the real fault is a fractured solder joint hiding under heat shrink. The result is a quadcopter not taking off, even with fresh 4S packs and a confident arm sequence.
Symptoms of a short circuit are often intermittent. One flight is smooth, the next motor stutters as if starving for voltage. Check the bullet connectors between the ESC and motor winding. A loose female connector can create resistance, heat, and eventual desoldering.
1. Disconnect all motor leads from the ESC.
2. Use a digital multimeter to test for continuity between each phase wire.
3. Inspect the connector housing for discoloration or melted plastic.
A broken wire inside the silicone insulation is harder to spot. It looks perfect until you bend it. Replace any suspicious lead with fresh silicon wire and re-crimp. A quadcopter not taking off usually waits for you to discover this fault after swapping three other parts. The motors are waiting, but the electrons cannot reach them through a fractured path.
Controller and Signal Connection Issues
Radio Transmitter Not Properly Bound
Nothing kills a flight session faster than a controller that refuses to speak to its receiver. You arm the motors, hear them spin, then watch the rotors stall the moment you push the throttle. That silence often traces back to a radio transmitter not properly bound to the onboard receiver. The binding process creates a unique digital handshake, and any interruption, a weak battery, background interference, or a delayed button press, leaves the flight controller blind. Safety protocols then override your inputs. The result is a quadcopter not taking off despite full power and healthy batteries.
Signal connection issues rarely announce themselves clearly. Sometimes the receiver enters bind mode but fails to store the transmitter’s ID. Other times, the wrong protocol gets selected in the flight software. Here are three sneaky causes:
- A binding plug left inserted after power-up, confusing the receiver’s channel mapping.
- The transmitter broadcasting on a different frame rate than the receiver supports.
- A low transmitter battery triggering failsafe before you even lift off.
Each of these quietly isolates your controls. A quadcopter not taking off is simply the visible consequence of an invisible breakdown.
Interference from Nearby Electronic Devices
Picture this: you have verified every component, yet a quadcopter not taking off remains stubbornly grounded. Nearby electronic devices can silently sabotage your control link. A Wi-Fi router, a cellular tower, or even a neighbour’s drone transmitter emits signals that overwhelm your receiver.
These interference sources create packet loss. The flight controller receives corrupted commands, then triggers failsafe to protect the motors. You push throttle, but the rotors stutter.
- Your mobile phone broadcasting on 2.4 GHz while arms are armed.
- A microwave oven leaking radio frequency noise from your kitchen.
- High-voltage power lines generating broad-spectrum interference.
Each one can generate a phantom signal. The result is a grounded machine.
Antenna Placement or Damage
Your control link relies on a component many pilots ignore. The antenna is the physical voice of your transmitter and receiver. A weak voice gets lost in the noise, and your quadcopter not taking off may be the first sign of that silence.
A damaged antenna can strand your machine as firmly as a dead battery. The internal wire is delicate. A hard landing, a snagged tree branch, or a storage bag thrown into a corner can kink the core without leaving a visible mark on the casing. The signal range collapses, and the failsafe engages at close distance.
Sometimes the issue is simpler. The antenna connector on the flight controller works loose from vibration, or a receiver antenna is tucked under the frame, shielded by carbon fibre. The position matters as much as the physical health of the wire itself.
– A cracked or bent antenna base
– A loose U.FL connector on the receiver
– An antenna tip that has snapped off cleanly
– A replacement antenna with the wrong length for your frequency
All of these lead to the same frustrating symptom. You arm the motors, you apply throttle, and nothing happens as it should. The rotors spin briefly, then hesitate, as if the signal never fully arrived. Before blaming the electronics inside the drone, walk around and trace the signal path. Look at the antenna mount, inspect the full length of the wire, and confirm the connector is seated with a firm click. A quadcopter not taking off often only needs a voice that can carry.
Range Limitations or Signal Loss
The sky is a demanding stage, and the distance between your fingers and your quadcopter is a negotiation with the air itself. When that negotiation fails, the machine sits on the grass like a stone. The controller and receiver speak through a fragile thread, and distance breaks that thread long before failure seems possible.
Signal loss is not always a dramatic event. The aircraft doesn’t need to be a speck on the horizon. The effective range depends on the environment, the battery power in the transmitter, and the precise angle of your antenna. Fail to consider the noise floor of a city, and the command link collapses earlier than you expect. The quadcopter not taking off is the first recorded symptom in this silent collapse.
Within a dense environment, the maximum distance shrinks. A physical obstruction of buildings or high-tension power lines can swallow the signal entirely. The rotor speed drops, the lights blink, and a fail-safe initializes.
– A fully charged transmitter battery matters for output power and stability.
– The orientation of the controller’s antenna must mirror the receiver’s position.
– A loss of orientation, even at fifty feet, can trigger a hold command.
– The frequency band is capped for line of sight only.
– Radar, Wi-Fi, and microwave pulses can saturate the same channel.
The mountain of Cape Town offers a clear path for a signal, but the valley floor absorbs it. A return to home via GPS does not matter if the transmitter and receiver do not greet each other first. The throttle is a request, not a whisper. If the request is lost, the request never lands. The silence is the root cause of the quadcopter not taking off.
Range specifications on a box are measured in ideal, empty worlds. The real world has curiosity, signal saturation, and a horizon that bends. Treat every flight as a negotiation with physics. You need to account for the noise, the location, and the distance. The aircraft sits stationary until the relationship is re-established. The quadcopter not taking off is a direct result of that broken negotiation.
Firmware, Calibration, and Software Glitches
Outdated or Corrupted Firmware
Firmware is the flight controller’s internal program. When it is outdated or corrupted, a perfect quadcopter can refuse to spin its motors. I have seen South African pilots blame hardware when their quadcopter not taking off was fixed by a reflash. Outdated firmware has bugs that block motor startup or ignore throttle input.
Calibration settings sit alongside that firmware. If sensor data drifts, the drone thinks it is tilting, so it locks the rotors. A corrupted update from a failed download or power cut mid-flash causes the same failure. Signs of a software issue are:
- Rapidly blinking LEDs
- Motors beeping but not moving
- No battery or attitude data
These signs separate software from mechanical trouble. Reinstall the correct firmware and re-run calibration. Ignore this layer, and you will swap parts for nothing.
Gyroscope and Accelerometer Calibration Errors
Even a clean motor and fresh battery will not save a quadcopter not taking off when the flight controller trusts faulty sensor data. I have watched a drone sit stubbornly still because its accelerometer recorded a crooked zero point. The rotors spin, stutter, then cut out.
The gyroscope and accelerometer demand exact reference angles. A hard landing or rough bump shifts that reference. The controller then corrects for a tilt that does not exist, and the motors refuse to spin normally. Relevel the drone, open the software, and run the calibration routine twice!
- Motors spool up then cut off at random
- Drone drifts before takeoff
- Sensor values never settle to zero
If a previous firmware update failed mid-write, reflash it. Then calibrate again. A quadcopter not taking off from these software glitches will respond once the controller trusts its senses.
Software Bugs or Configuration Conflicts
Firmware governs every command the flight controller sends. A quadcopter not taking off may stem from a software bug that corrupts motor output timing, or a configuration conflict between the controller and the radio receiver. These faults are rarely visible on the bench. They appear only when the drone sits on the ground and refuses to lift.
Check the most common sources of conflict:
- Motor direction set opposite to the actual wiring
- Throttle curve inverted in the transmitter profile
- Flight controller expecting a GPS lock before arming
Each fault mimics a mechanical failure. The rotors may spin up, hesitate, then die. Reflash the firmware with a fresh copy and reset all parameters to the factory defaults. Re-run the calibration routines afterward. A quadcopter not taking off from software trouble will rise once the logic and the hardware agree.



0 Comments